
Setting 1:1 Landing Page and Envelope Defaults
If you tend to use the same landing and envelope details for most of your 1:1 communications, configuring default settings can be really helpful for streamlining your workflow. Let’s explore how to set these up!
Note: Defaults can be changed at any time! To do so, follow the same steps outlined below to edit previously-selected options.
1:1 Landing Page Defaults
Step 1. Record a 1:1 Video and Access 1:1 Video Options
You can set landing page defaults directly from your 1:1 Video page. Record a new video or add an existing video to your Video List via the 1:1 Video Library. Once added, open the Landing Page Settings dropdown found beneath 1:1 Video Options.
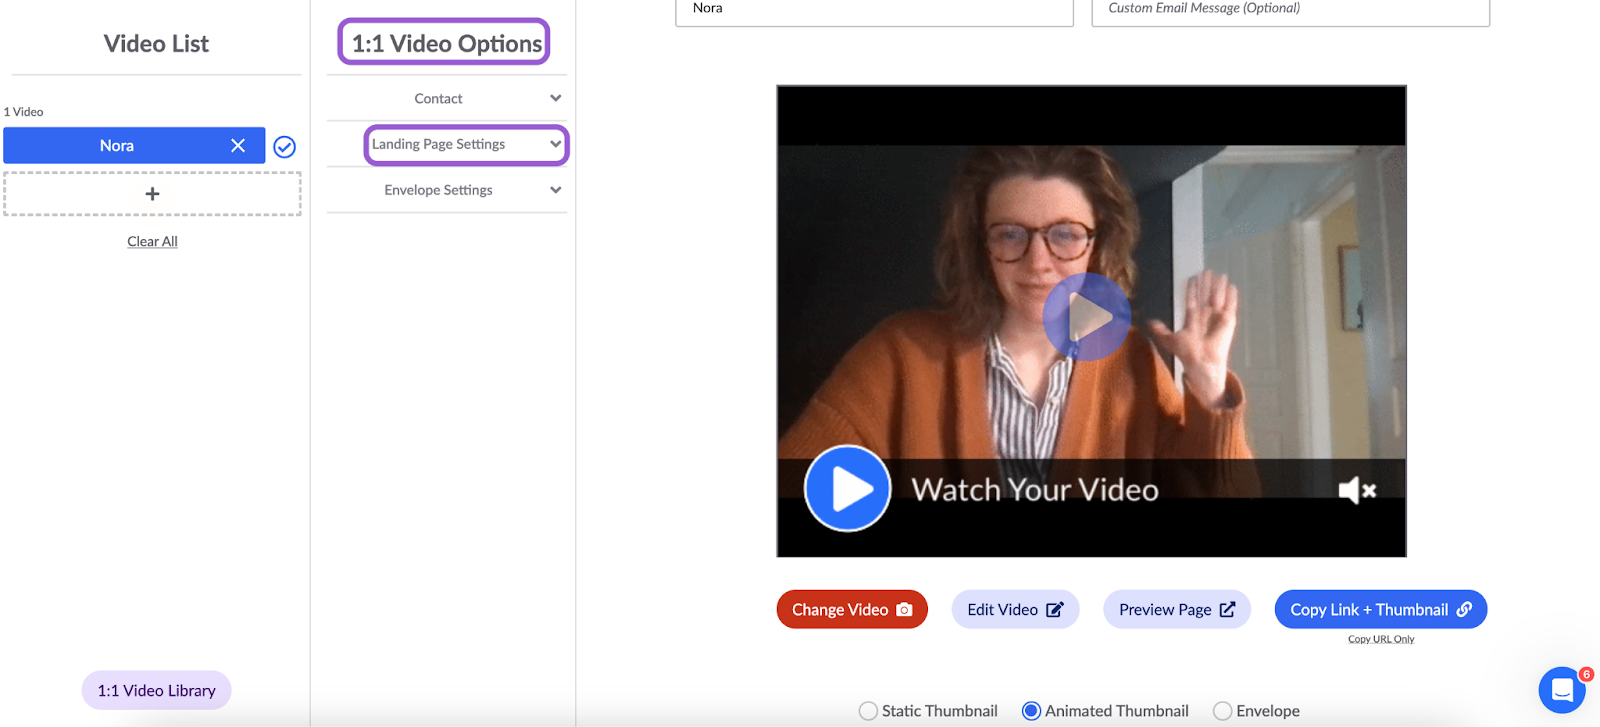
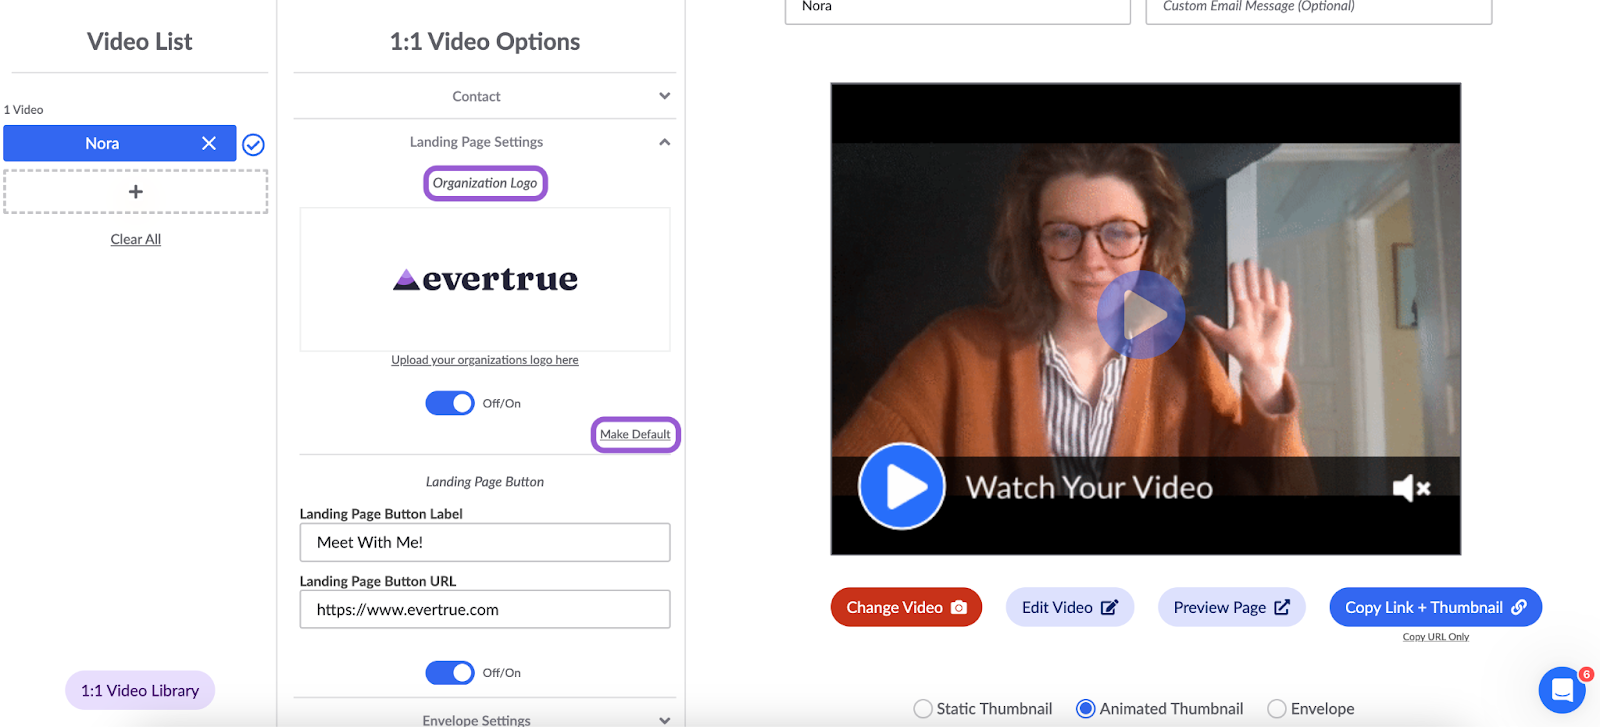
Step 2. Set an Organization Logo Default
You have the option to upload your organization’s logo to your 1:1 Video’s landing page. After configuring your preferred settings for Organization Logo, click the Make Default button to save them. Upon setting the default, you’ll be asked to confirm your selection.
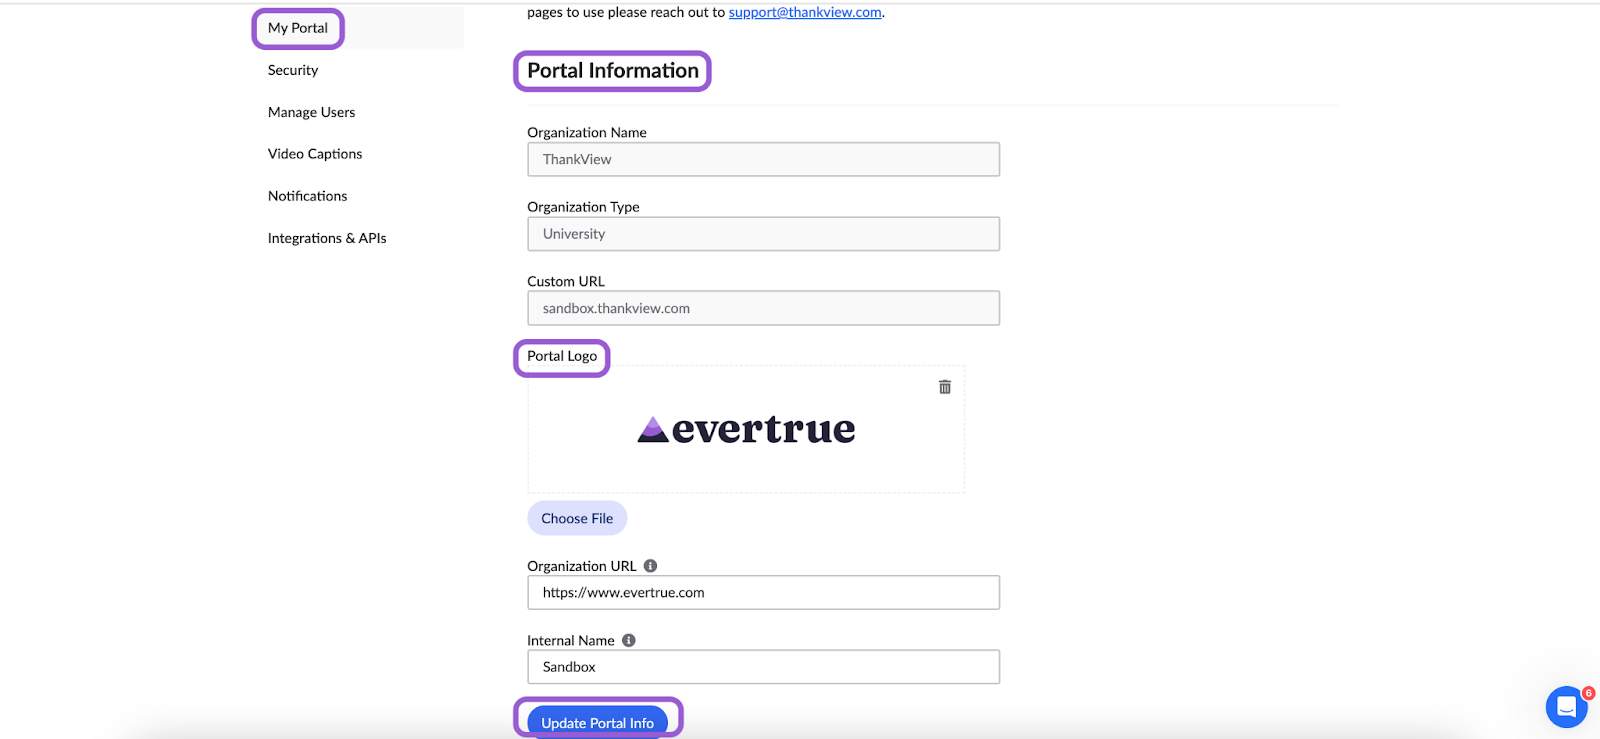
Note: Additionally, you have the option to set up a default logo by accessing your Settings from the monogram profile button in the top-right navigation bar. Head to My Portal and locate the Portal Information section. Here, you can upload a file to serve as your Portal Logo, which will be the default logo for your 1:1 Videos. Don’t forget to click Update Portal Info to save your changes!
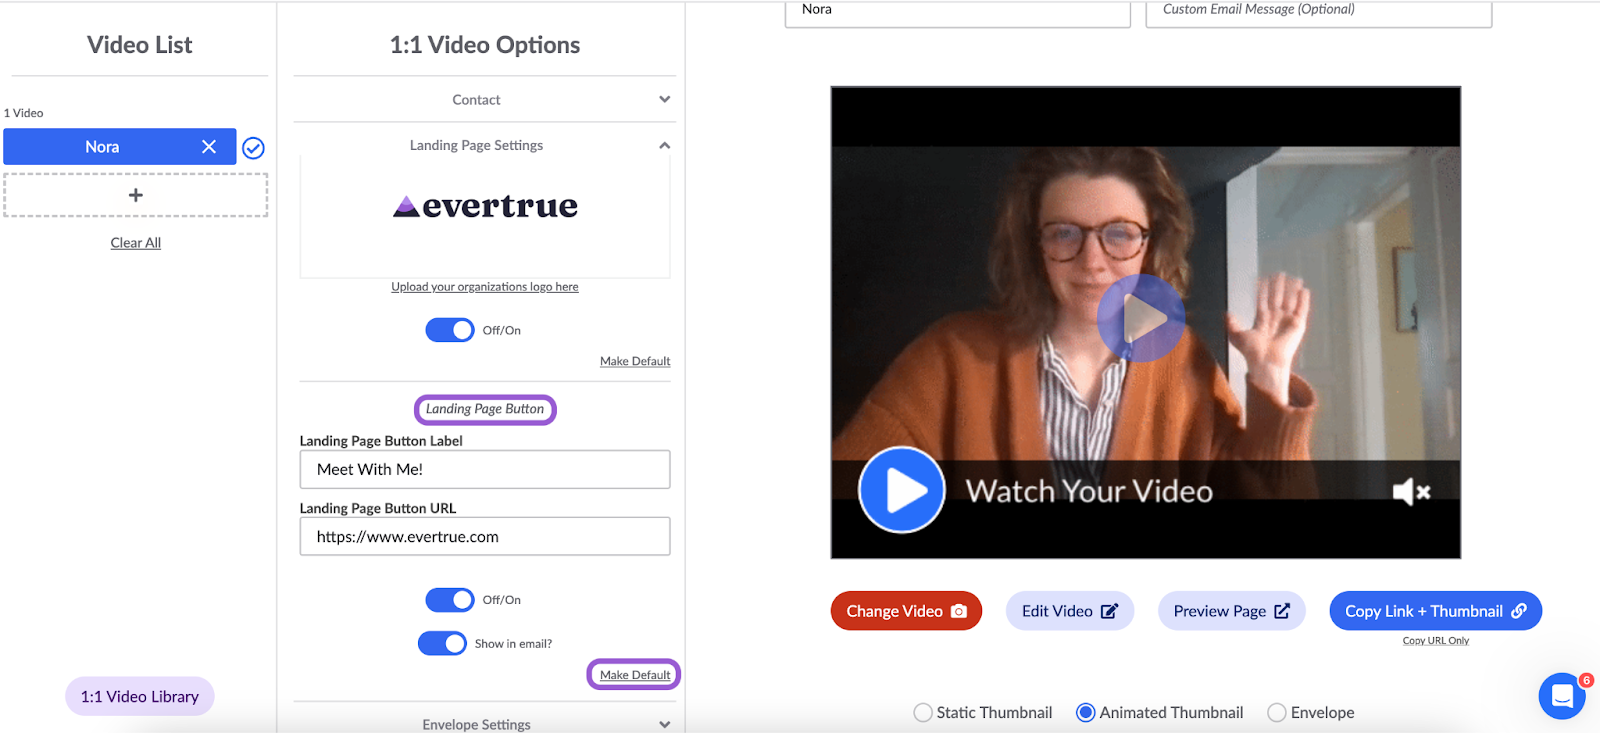
Step 3. Set a Landing Page Button Default
Next, you can customize a landing page button label and URL for your 1:1 Video’s landing page. After configuring your Landing Page Button options, click the Make Default button to save them. Upon setting the default, you’ll be asked to confirm your selection. Upon setting the default, you’ll be asked to confirm your selection.
Step 4. Set a Branded Landing Page Default
Lastly, you can create or select a branded landing page for your 1:1 Video. Under Landing Page Builder, build a new backdrop by clicking the Create Landing Page button. If your organization has a dedicated team that oversees branding, use the Copy Shareable Link button so they can build the landing page. To choose from your portal’s existing branded landing pages, select from the scrollable list. Once your settings are configured, click the Make Default button to save them. Upon setting the default, you’ll be asked to confirm your selection.
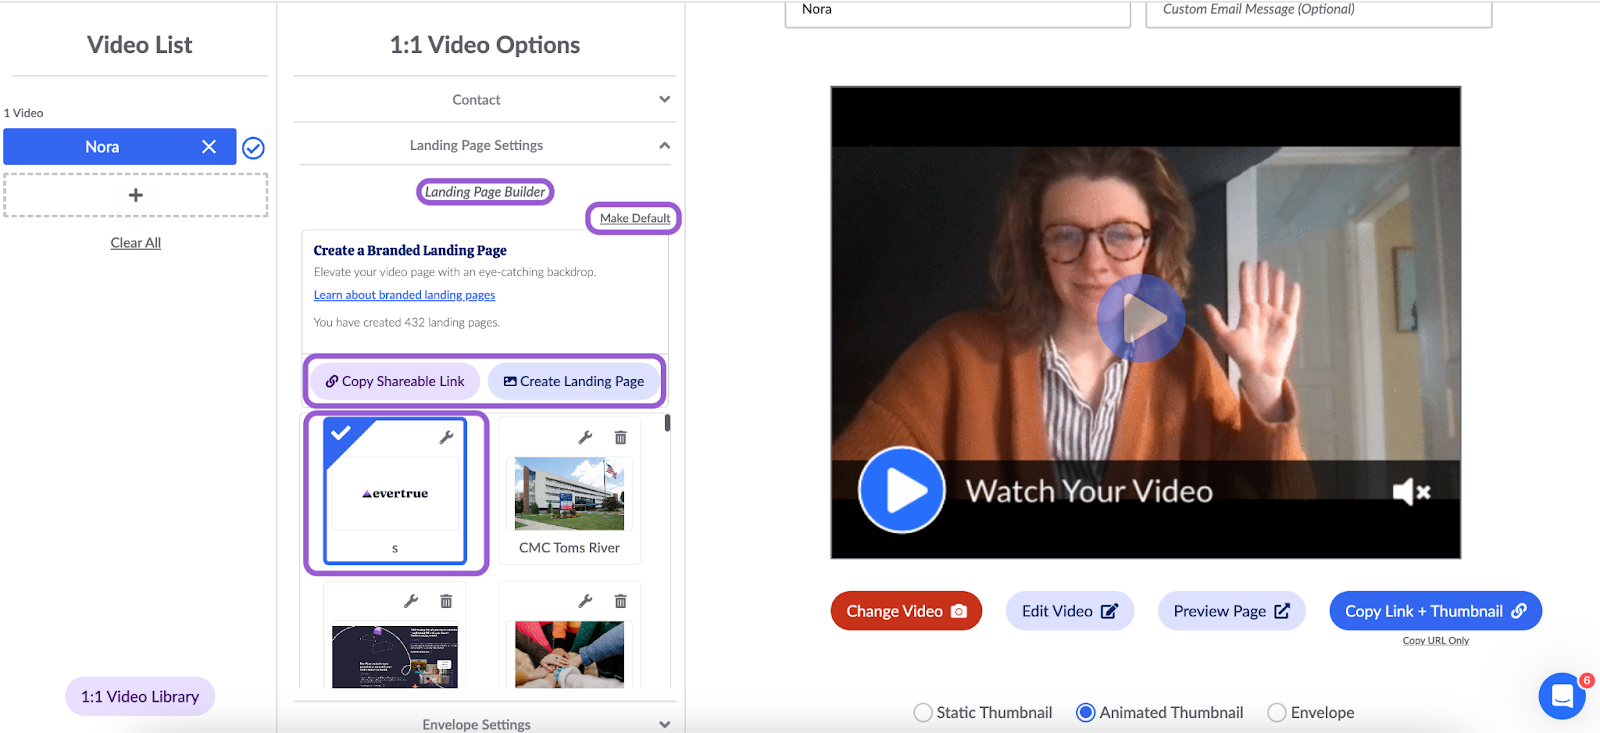
Note: Creating a new branded landing page or using an existing landing page with a different logo will override any logo that was previously uploaded under Organization Logo or in Settings > Portal Information > Portal Logo.
1:1 Envelope Defaults
Step 1. Record a 1:1 Video and Access 1:1 Video Options
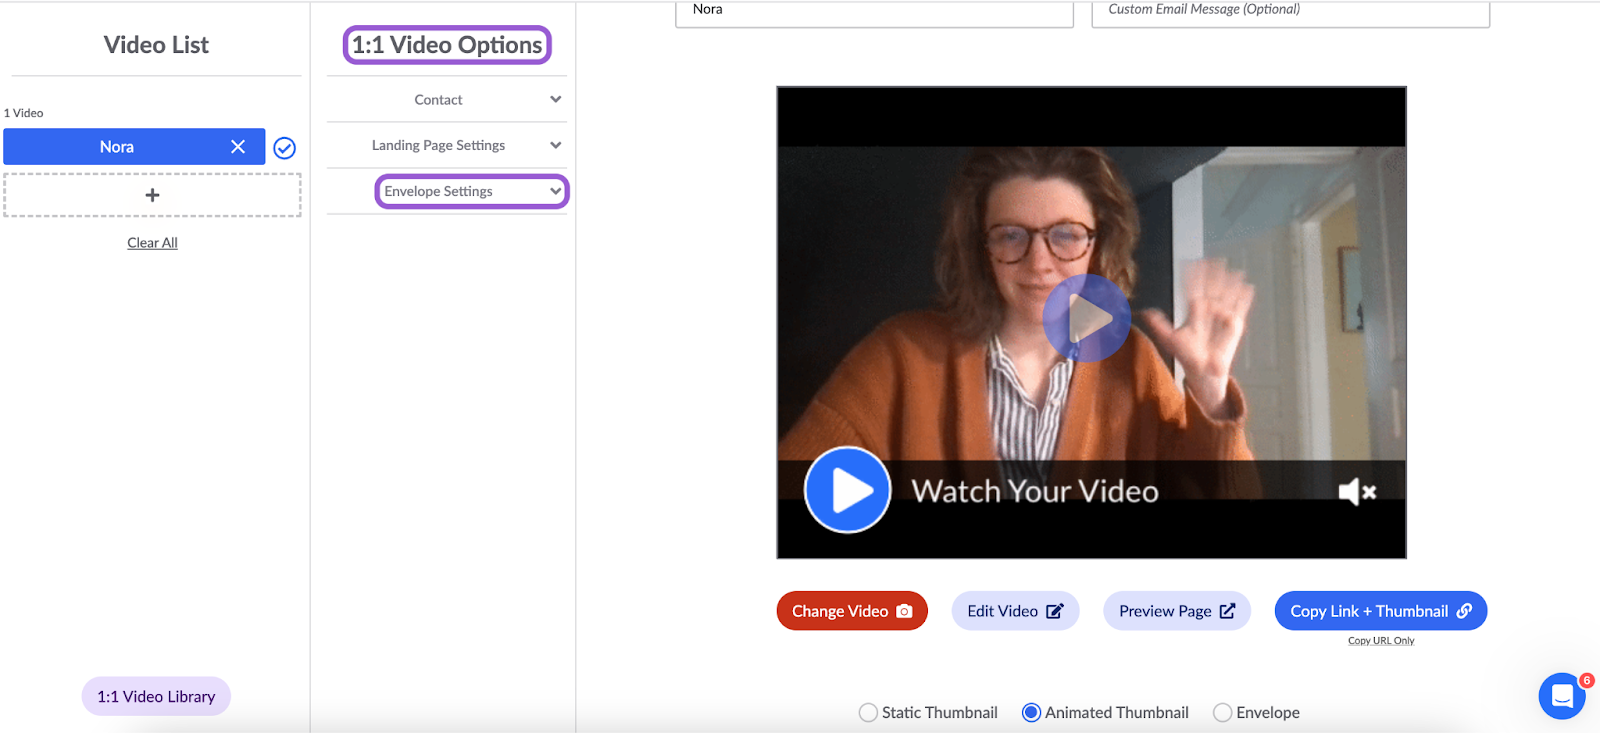
You can set envelope defaults directly from your 1:1 Video page. Record a new video or add an existing video to your Video List via the 1:1 Video Library. Once added, open the Envelope Settings dropdown found beneath 1:1 Video Options.
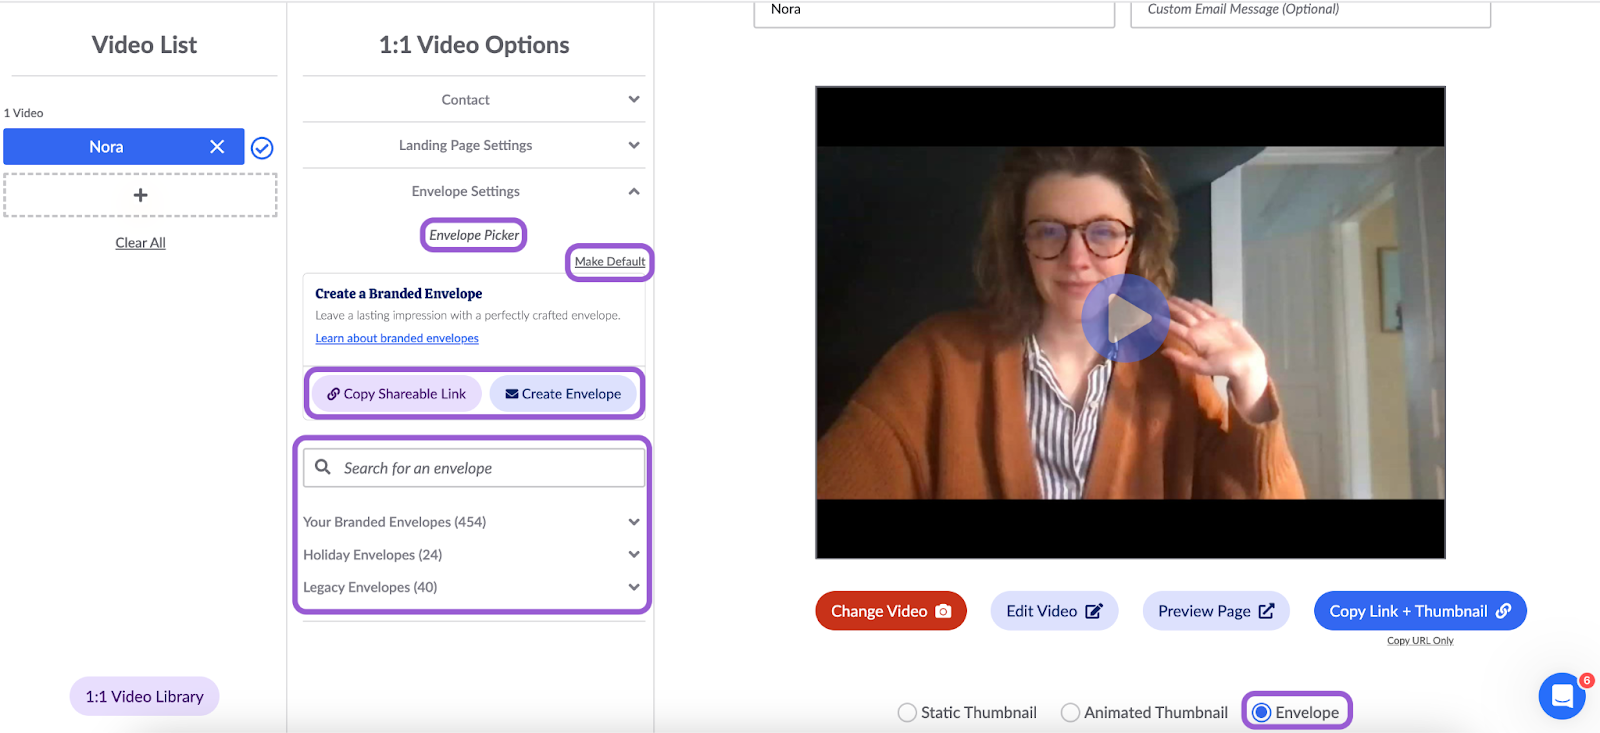
Step 2. Set an Envelope Default
Within this section, you can create or select an existing envelope for your 1:1 Video. Under Envelope Picker, build a new envelope by clicking the Create Envelope button. If your organization has a dedicated team that oversees branding, use the Copy Shareable Link button so they can build the envelope. To choose from your portal’s existing envelopes, select from an envelope dropdown or search for its name. Once your settings are configured, click the Make Default button to save them. Upon setting the default, you’ll be asked to confirm your selection.
Note: If you plan to send your video with a branded envelope, be sure to select the Envelope thumbnail option before copying the video’s link!
For any other questions, reach out to support@thankview.com.
Reply
Content aside
- 4 mths agoLast active
- 91Views
-
1
Following